8 Secrets To Grow a Bumper Crop of Peppers
By: Author Cheryl Magyar
Posted on Published: March 19, 2021 – Last updated: April 5, 2022
28063shares

Spicy or sweet, peppers are always a treat to grow in your garden.
Especially if you love salsa. And who doesn’t?!
We canned ten jars of spicy salsa last summer when tomatoes and peppers were in season. The last batch disappeared mysteriously on New Year’s Eve. Guess we need to up that number next year.
Another reason you might be interested in growing peppers, is that you love to eat them fresh. Do you not? Crunching with delight in every bite?

Get ready for your best pepper harvest yet.
Perhaps you prefer your peppers roasted, grilled, or in salads.
Or maybe you dare to adventure on the spicy side of life. That is, when you’re growing anything from jalapeños to orange habaneros. Anything spicier than that and you must be a dedicated pepper connoisseur to truly enjoy the potentially burning experience.

Even on the vine some hot peppers are hot, hot, hot.
No matter where you fall on the pepper spectrum, or Scoville scale, across the board there are some basic things you need to know about growing capsicums.
Growing Conditions for Peppers
While planting, tending and harvesting your pepper crop isn’t difficult (and most articles will say that growing peppers is easy) there are some problems that can arise.
Without the proper growing environment, your pepper harvest doesn’t stand a chance. Cold nights are more detrimental than heat.
Pepper plants (Capsicum annuum) generally thrive in temperatures between 60-90 °F.
More optimally they prefer 70-80 °F. A little more, rather than a little less.
If your climate cannot provide for such a tight temperature range, it is possible to grow them in a greenhouse or polytunnel. Peppers are also one of those garden vegetables that are suitable for container gardening.

Put a potted pepper on your patio.
If you want to grow peppers, keep both daytime and nighttime temperatures in mind. It’s the deciding factor of your abundant or less than imagined harvest.
With the temperature under control, let’s move onto other ways to increase your chances of peppery success.
8 Easy-Growing Tips for Abundant Peppers
Again, sweet or spicy, there are rules for growing both kinds of peppers, though mostly the growing conditions overlap.

Not all peppers have the same requirements.
The differences will be noted where necessary.
Besides these eight pepper growing tips, it’s also important to know not only how to plant the seeds, but when to plant them.
If you’re in the far south, it may be possible to plant pepper seeds directly in the garden. However, for the most part, pepper seeds should be planted indoors, due to their long growing season (particularly hot peppers).
Pepper seeds should be started indoors about 8-10 weeks before being transplanted in the garden. As far as transplanting your peppers into the garden, this should happen 2-3 weeks after your last expected frost date when nighttime temperatures do not dip below 60 °F.
It takes a bit of calculation on your part, but the rewards will be great when you get it right.
1. The trick for getting pepper seeds to germinate
Getting pepper seeds started doesn’t always come easy. That is why many of us leave this crucial job to the more experienced staff at the nurseries and garden centers. After all, they must know what they are doing.
But do you know what? You can start your own peppers from seed too! It takes a little patience, sometimes a bit of luck, and eventually they will come around. At least some of them.
Pepper seeds can germinate in about a week when temperatures are just right: 70-80 °F.
That’s pretty hot, compared to other garden vegetables. Even with ideal germination temps, your results can vary from variety to variety, with hot peppers being the more finicky ones.
To speed up your rate and success of pepper germination, take a thick paper towel, get it wet and thoroughly squeeze it out. Now, that it’s damp, place the pepper seeds inside and place the whole thing in a plastic bag in a warm place. The top of the fridge or a kitchen countertop will work just fine.

Wakey-wakey, little seeds, it’s time to germinate.
When your seeds begin to sprout, you can very carefully plant them in individual containers where they will grow for the next two months.
Yes, peppers belong to the group of 15 vegetable seeds to sow in January or February. It’s almost never too early to think about planting them.
2. Planting your peppers in the right space
Peppers are a sun-loving crop that thoroughly enjoys the heat of the sun. About 6-8 hours of full sun is sufficient for optimal growth.

Sun-loving peppers.
That being said, bell peppers can tolerate some partial shade, being the fleshy, juicy peppers that they are. When your peppers are less stressed, they will require fewer interventions as well.
Hot peppers, on the other hand, will appreciate all the sun they can get. Those spicy varieties will be less productive in the shade.

A selection of hot peppers is always handy in the kitchen.
3. Plant your peppers in ideal soil
Pepper plants can be a bit picky about where they stand, preferring a well-draining sandy loam that is rich in organic material.
Give them that and all should be happy, everything else considered.

So, while you’re considering where to place them in your garden, it’s worth noting peppers should be planted where they haven’t grown recently.
This brings in a whole other area of expertise called crop rotation that is definitely worth looking into. Not only will this aspect of gardening help with growing peppers, but it can also be a boon for your potatoes and tomatoes as well.
While adding compost is most often the right thing to do to cater to your young pepper plants, you need to be aware that too much nitrogen in the soil is a bad thing. This condition makes pepper plants grow fast, at the same time they become less productive.
Sweet peppers mature in 60-90 days. Hot peppers can take up to 150 days. You need to find your own planting sweet spot in all of this.
4. Planting and hardening off pepper seedlings
Before you even begin to think about plant spacing, you’ll have to wait for the right moment to begin hardening off your pepper seedlings.

Hardening off simply means exposing your seedlings to lower temperatures, so they can gradually get exposed to outdoor conditions. You can’t just take them directly from the greenhouse and plop them in the soil. That would be too much of a shock!
Instead, take your tray(s) of seedlings outside when daytime temps hit mid-60s. Leave them by the warm edge of your house or garage for a few hours each afternoon, 3-4 days in a row.
As you take them in and out (never leave them out at night), you can increase the number of hours they stay outside.
When all danger of frost has passed, it’s finally time for planting. Plant them a little bit deeper than they were in their containers.
And leave plenty of room between your pepper plants, about 10-18″ apart, with 18″ between rows.
Related reading: Plant Spacing – 30 Vegetables & Their Spacing Requirements
5. Finding the right amount to water your peppers
Peppers don’t need a ton of water – about 1″ of water per week – so don’t get in the bad habit of soaking them every day.

Place your efforts more on the soil than the watering.
Rather focus on getting the soil conditions right. Remember that a well-draining soil with abundant organic matter is ideal. The organic matter not only provides nutrients, it helps to enhance moisture retention as well.
In combination with light watering, it is often helpful to mulch your peppers.
6. Mulching your peppers
Mulching pepper plants prevents weeds, first and foremost.

Mulching makes your job easier.
Secondly, and no less important, mulch prevents excessive evaporation from the soil surface.
A sufficiently thick layer of mulch is one of the keystones to (almost) never watering. Just make sure to lay down the mulch after the soil temperatures have warmed up under the sun.
In the end you get to water less and work less, as your peck of perfectly picked peppers grows on its own.
7. Pinching off the first pepper flowers

Nip it in the bud for more peppers later on.
It may seem counter-intuitive at first, but your pepper plants can benefit from an early removal of flowers. In a similar fashion as to how you prune tomatoes to improve overall yields.
As you pinch off the first developing blossoms, you are suggesting to the plant to put more energy into growing, such as deepening their roots, thus making a stronger plant. Doing so, also prevents your peppers from producing fruit too early which may be susceptible to disease.
Here’s our total guide to pruning pepper plants for huge yields.
8. Knowing when to harvest your peppers
The closer you get to harvesting, the more you can taste the delicious homegrown pepper on the tip of your tongue. If you’ve followed some of the aforementioned pepper-growing tips, we hope you’re satisfied with your results.

Where’s the hummus? This pepper is ready to eat.
It’s one thing to look at them ripening in the garden as you pat yourself on the back for a job well done. But, do you know when they are actually ready to harvest? Most of us can only assume, as we tend to buy peppers exclusively from the store.
The first-time pepper grower can be reassured by this simple piece of advice: the flavor will always be sweeter and more pure when peppers are allowed to fully ripen on the plant, to whatever color that may be.
Peppers can be red, yellow, orange, purple or green, or shades in between.

Peppers are one of the most colorful vegetables you can grow.
Another train of thought, or another way to harvest, is to harvest peppers before they’re fully ripe, as one may do with cucumbers. Then let them mature off the vine.
The reason being that peppers can be harvested at just about any stage of growth, although their flavor isn’t fully developed until maturity.
It’s your garden and your call.
The longer you leave your peppers to ripen under the sun, the more flavorful they will taste and the more vitamins they will contain. If you harvest them younger and more frequently, you can obtain a larger yield, with a slight loss in flavor. One way around this is to grow more than one variety – so you can harvest the best of both worlds.
One thing is for sure, use your pruners or a sharp knife for harvesting. Never pull peppers off the plant, so as not to damage the stems or uproot the entire plant.

Be gentle when harvesting peppers by using garden snips.
One last takeaway message on growing peppers.
In your quest for an abundant pepper harvest, you may also want to consider companion planting.
Peppers make good neighbors with herbs that attract beneficial insects, such as basil, dill, chives, oregano and parsley. They also benefit from the vast company of other garden veggies: lettuce, eggplant, chard, cucumbers, carrots, beets and tomatoes.
What doesn’t pass the pepper companion test, however, is fennel and most Brassicas.
You can read our complete companion planting guide for peppers here.
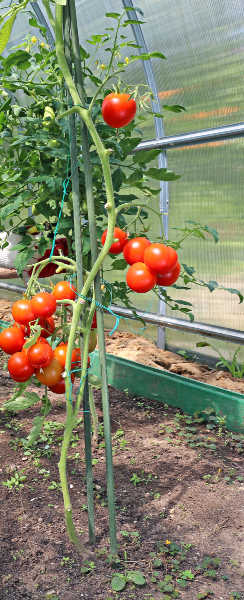
During the season, once your peppers really get growing, you may find that the larger and sweeter varieties may need staking. Use this pepper growing technique only where needed.
If you’re growing peppers of the spiciest kind, be sure to protect your hands when cutting into them, perhaps even cutting them on a plate, rather than your regular wooden cutting board and wearing gloves too.

It’s better to be safe than sorry when it comes to handling hot peppers.
That powerful capsaicin in the fruit can burn for longer than you expect, should you happen to get it anywhere it is not welcome, particularly around your mouth, nose and eyes. There is a reason that it is included in bear spray.
After that, it is up to you to freeze, pickle and dehydrate your peppers for continuous use throughout the year.
7 Ways to Use Coffee Grounds in the Garden
Coffee grounds are great for your garden!
July 11, 2017 – Updated on October 27, 2021

239shares
You might be surprised to learn that coffee grounds can actually improve your garden soils.
They add nitrogen, potassium and other minerals which will help the growth of plants in any type of environment!
Here are the best 7 uses of coffee grounds in your garden that will amaze you!

1. Composting
Coffee grounds are a great way to add nitrogen when composting. They contain valuable nutrients that help promote the growth of plants, microbes and worms in your pile!
2. Pest Control
Add a layer of coffee grounds around your plants and protect them from slugs, snails, aphids – the little guys that love to suck on leaves.
3. Cat Repellent
If you want to keep your cats away from the garden, try sprinkling some coffee grounds in their favorite spots. They will most likely avoid digging after that!
4. Acid-Loving Plants
Coffee grounds are a great way to increase the acidity and nutrients in your soil. They’ll also keep pests away! Put them around roses, rhododendrons, holly plants like gardenias or semi-evergreens for best results.
5. Easy Fertilizer
You can use coffee grounds to make a diy fertilizer that is an excellent way of getting all the nutrients needed for plants. Place two cups of coffee grounds in five gallon bucket with water and let it steep overnight.
6. Mulch
Coffee grounds make an excellent mulch for fighting weeds and keeping your vegetable plants hydrated during the hottest times of day.
7. Boost Carrot & Radish Harvest
Double your harvest of carrot and radish, by mixing the coffee grounds with the seeds.
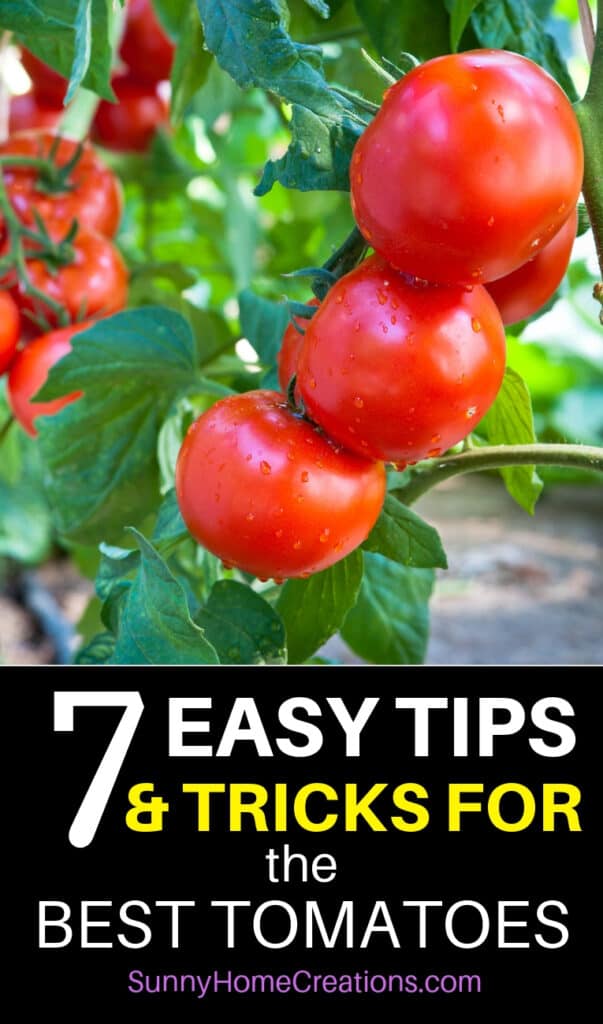
7 Tips and Hacks to Grow Huge, Juicy Tomatoes
Sharing is caring!
27.7Kshares
This post may have affiliate links. If you click one of these links and make a purchase, we will be paid a commission at no additional cost to you.
When you talk about growing fruits and vegetables in your garden, tomatoes will immediately come to mind. This fruit is one of the most commonly grown plants.
Although there are thousands of edible fruits and vegetables that can be grown in your garden, tomatoes are one of the top favorites. They can be produced in a short span of time, plus, they are pretty easy to grow successfully.
Whether you are planning to eat them on their own, use them as an ingredient in your favorite dish, or turn them into a sauce, nothing beats growing your own tomatoes.
There are so many ways to preserve tomatoes, that growing an abundance is always great!
But, to make sure that you get the freshest, juiciest, and biggest ones, here are 7 tips to keep in your mind when growing tomatoes.
Don’t Crowd The Seedlings
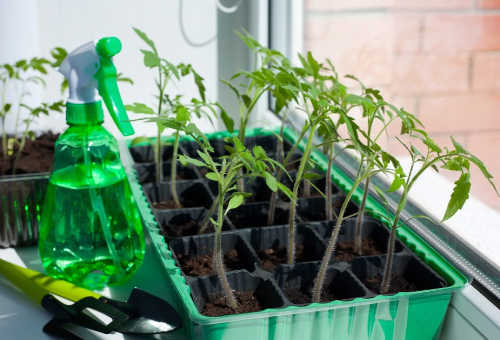
If you opt to start growing tomatoes from seed, you need to give the seedlings plenty of room to grow and to branch out. You have to separate the strong ones from the weak ones.
This means you need to place one strong plant per small pot or cell.
Snip the smaller and the weaker seedlings and maintain the best ones.
Placing the seedlings in crowded conditions will inhibit their growth.
This will stress the plants and that will eventually lead to diseases or death.
Make Sure TheY Get Plenty Of Light
In order to grow, tomatoes need strong and direct sunlight.
To ensure that the seedlings will grow stocky, place them in an area of your home where they can get at least eight to ten hours of sun a day.
However, if you are growing tomatoes during winter, there might not be enough sun.
Placing the plants near a sunny window may not be sufficient to get enough natural light.
In that case, the best option is to use artificial plant lighting for 12 to 16 hours a day.
Plant Them Deeper
When planting the tomatoes directly onto the garden bed, plant them deeper — all the way to the top few leaves. Once you bury the stems, the plants will develop roots along their stems.
The more roots the plants have, the stronger they will grow.
Turn On A Fan
To develop strong stems, the tomato plants have to move along the breeze.
This will happen naturally when planted outside.
However, if you are planting them in containers or keeping them indoors, you need to provide an alternative type of circulation.
You can create a breeze by turning the fan on for about five to ten minutes, two times a day, for a GENTLE breeze.
Get Rid Of The Bottom Leaves
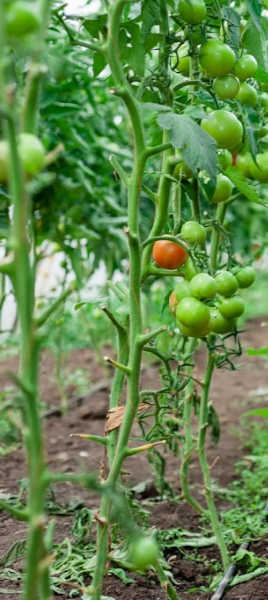
Once your tomato plant reaches 3 feet tall, get rid of the leaves at the bottom part of the plant. These are the oldest leaves of the plant and most likely the first ones to develop fungus.
As the tomato plant grows, the bottom leaves are getting the least amount of airflow and sun. Removing these leaves can prevent fungal problems and other diseases.
RELATED: Different Ways to Stake Tomatoes
Pinch And Prune
Do you see those small stems developing in between the two larger branches of the plant? You need to get rid of them.
Pinch and prune the smaller branches that grow between the larger, stronger branches. They don’t bear any fruit, yet, they take nutrients and energy away from other parts of the plant.
Share Your Eggs And Coffee
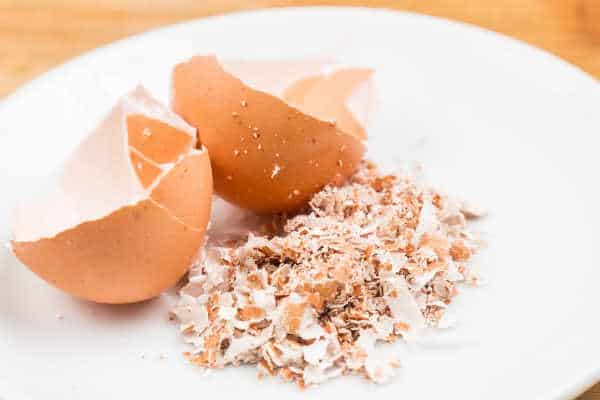
Put your waste to good use. Use coffee and eggshells to feed your plants.
Coffee grounds provide nitrogen to the soil. They can also repel snails and slugs that feed on the leaves and fruits.
Eggshells add calcium to the plant. They aid in regulating the moisture intake and prevent blossom end rot, a common tomato problem.
Take your coffee grounds and eggshells, put them in the blender, then make a slurry. Mix the solution into the soil.
Growing tomatoes may be easy, but growing the huge, juiciest ones may take a bit of effort. Make sure to take your time in planting your tomato plants to get the best of them.